Aspia Host
Table of contents
- Purpose
- Installing
- Automation of installation
- Settings
- Command line
- Environment variables
- Logs
- Notes
1. Purpose
Allows accepts incoming connections from Clients and Consoles to manage the computer on which it is installed.
2. Installing
The Host is only available for Windows.
Windows x86
  Run aspia-host-2.7.0-x86.msi and follow the instructions on the screen.

Windows x86_64
  Run aspia-host-2.7.0-x86_64.msi and follow the instructions on the screen.
3. Automation of installation
Aspia Host has the ability to automate the installation and configuration of parameters. To do this, you must do the following:
- Install Aspia Host on one of your computers
- Configure all the necessary parameters and add users in the Host GUI
- Export configuration to file aspia-host-config.json
- Place the aspia-host-config.json (this file name and extension is required) file in the same directory as the installer
If you place this file in the same directory as installation MSI package, the configuration will be automatically imported during installation. Installation must be done from a local location (any of the local disks or a flash drive). This may not work when installing from network locations or when deploying using AD.
4. Settings
To change Host parameters, the application has a Settings dialog. Below is an overview of the possible options.
4.1. General tab
On the “General” tab, you can configure basic application settings, as well as import and export settings.
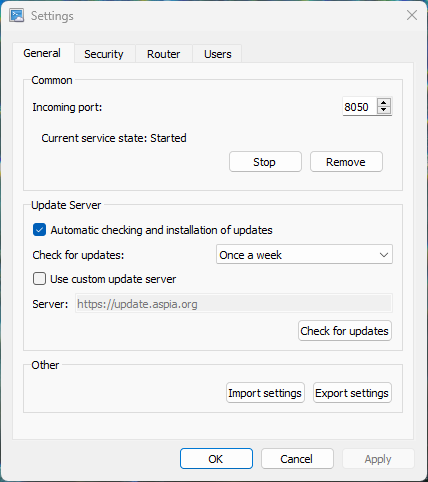
Incoming port TCP port on which the Host accepts incoming connections.
Update Server Update options. You can enable automatic updates at specified intervals, specify your update server (if you have one), or check for updates directly from the Settings dialog.
Import/Export Import and export settings allow you to save the current configuration to an JSON file for later recovery (for backup purposes) or automatic deployment.
Import and export of parameters can be done through a graphical user interface and from the command line.
To perform import and export via a graphical interface, the “Export” and “Import” buttons in the Settings tab in the “General” tab.
To perform import and export via the command line, use the following commands (for “silent” import and export without displaying messages or dialogs, add argument --silent):
aspia_host --import <file>
aspia_host --export <file>
4.2. Security tab
On the “Security” tab, you can configure settings for additional protection of the application.
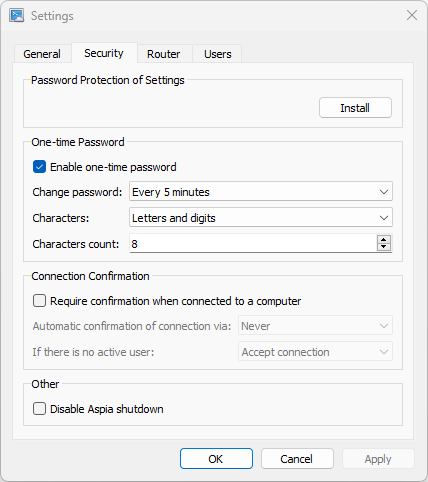
Password Protection of Settings This option allows you to set a password that will be requested when you try to open the Host Settings dialog. This password does not protect against replacing the configuration file or manual modification of the configuration file, but administrator rights are required to replace or edit the configuration file. Also, when manually editing a configuration file, it is extremely difficult to create or change users, because this is a very complex mathematical problem.
One-time Password When this option is enabled, the Host interface will display a one-time password, which the user can dictate to the connector for a one-time connection. You can also configure the frequency of automatic change of this password (or disable automatic change, then the password will change only when the service is restarted), specify the characters that the password can contain and the length of the password.
Connection Confirmation When this option is enabled, a connection confirmation dialog will be displayed to allow the user to accept or reject the incoming connection. You can also configure the time interval after which the incoming connection will be automatically confirmed and the action that will be performed if there is no active user in the computer’s operating system when connecting (the connection can be automatically accepted or rejected).
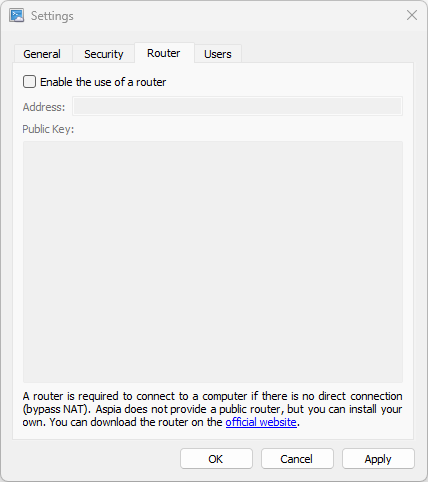
4.3. Router tab
On the “Router” tab you can specify parameters for connecting to the Aspia Router. Enter the server address and public key and apply the settings.
4.4. Users tab
To manage users, you need to run the Aspia Host Settings and go to the “Users” tab.
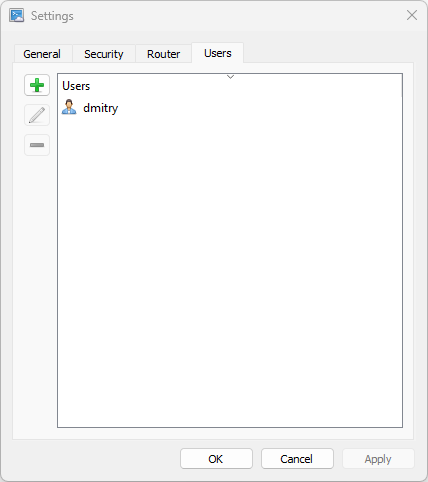
To add a user, click on the button with the icon  . To delete a user, use the button
  , and to edit button
  .
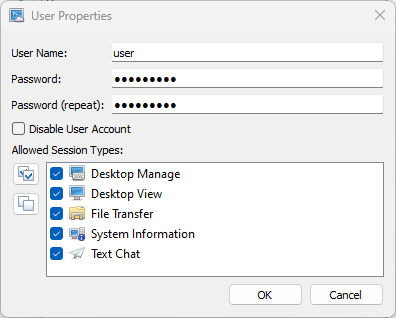
When adding a new user, you need to enter a username and password, as well as select the types of sessions that this user can connect to.
.
When adding a new user, you need to enter a username and password, as well as select the types of sessions that this user can connect to.
Warning! When you change your username, you also need to re-enter the password.
The dialog for adding or editing a user is as follows:
5. Command Line
aspia_host_service
| Argument | Description |
|---|---|
--host-id |
Displays the current Host ID. Note that the console and RDP sessions have separate IDs and the output of the command will depend on which session the process is running in. Displays the last received ID (cached ID). This means that the ID must be obtained at least once for the command to work. |
--version |
Displays the current version of the application. |
--install |
Performs a Host service installation. Administrator rights are required to execute. |
--remove |
Performs removal of the Host service. Administrator rights are required to execute. |
--start |
Starts the Host service. Administrator rights are required to execute. |
--stop |
Stops the Host service. Administrator rights are required to execute. |
--help |
Displays help about command line arguments. |
aspia_host
| Argument | Description |
|---|---|
--import=<config_file_path.json> |
Imports a configuration file. |
--export=<config_file_path.json> |
Exports a configuration file. |
--silent |
Enables silent mode for importing or exporting a configuration file. When this option is enabled, no messages are displayed. |
--version |
Displays the current version of the application. |
--update |
Displays an update check dialog. |
--config |
Displays the host configuration dialog. |
6. Environment variables
- ASPIA_NO_OVERFLOW_DETECTION - If the variable exists (with any value), then the automatic network stack overflow detection mechanism is disabled. If the variable does not exist, then Aspia tries to automatically adjust to the change in bandwidth by changing the FPS, scaling the image or other actions.
- ASPIA_DEFAULT_FPS - Determines the FPS with which the connection starts. If variable ASPIA_NO_OVERFLOW_DETECTION is not declared, then in the future the FPS can be lowered or increased. If variable ASPIA_NO_OVERFLOW_DETECTION is declared, then this FPS value will be used for the duration of the connection. It can take values from 1 to 60. The default value is 20.
- ASPIA_MIN_FPS - Determines the value to which the FPS can be reduced during automatic bandwidth adjustment. If variable ASPIA_NO_OVERFLOW_DETECTION is declared, then this value is ignored. It can take values from 1 to 60. The default value is 1.
- ASPIA_MAX_FPS - Determines the maximum value up to which the FPS can be increased during automatic bandwidth control. If variable ASPIA_NO_OVERFLOW_DETECTION is declared, then this value is ignored. It can take values from 1 to 60. For computers with more than 2 processor cores, the default value is 30. Otherwise, the default value is 20.
- ASPIA_NO_VERIFY_TLS_PEER - If the variable is declared, then the validity of the TLS certificate is not checked when checking for updates. It is not recommended to declare this variable unnecessarily. Declaring this variable can help solve the problem with checking for updates in Windows 7/2008R2, where root certificates are not updated.
7. Logs
To configure the Router logging parameters, use the following recommendations:
- To set the log level, declare an environment variable ASPIA_LOG_LEVEL with a value from 0 to 2. Decreasing the value increases the number of messages in the log.
- To enable logging to a file (if it is not enabled by default for platform), declare environment variable ASPIA_LOG_TO_FILE with a value other than 0. If the environment variable is declared with a value of 0, then logging to file will be disabled.
- To enable logging to stdout (if it is not enabled by default for platform), declare environment variable ASPIA_LOG_TO_STDOUT with a value other than 0. If the environment variable is declared with a value of 0, then logging to stdout will be disabled.
- Log files can have a limited size and after reaching the maximum file size a new log file will be created. By default, the maximum log file size is limited to 2 MB. If you need to change this size, then declare environment variable ASPIA_MAX_LOG_FILE_SIZE with a numeric value in bytes. The variable can take a value from 1024 (1 KB) to 10485760 (10 MB).
- By default, log files older than 14 days are automatically deleted. If you want to change this value, then declare environment variable ASPIA_MAX_LOG_FILE_AGE with a numeric value in days. The variable can take a value from 0 to 366. If the variable is set to 0, then the log files will not be automatically deleted.
The log file for Windows is located in the following path:
C:\Users\<user_name>\AppData\Local\Temp\aspia\aspia_host-*.log
C:\Windows\Temp\aspia\aspia_host_service-*.log
C:\Windows\Temp\aspia\aspia_desktop_agent-*.log
C:\Windows\Temp\aspia\aspia_file_transfer _agent-*.log
8. Notes
- The ID is linked to a computer using file C:\ProgramData\aspia\host_key.json. This file does not contain the computer ID, but it allows you to obtain the ID when connecting to the Router. The computer ID is assigned upon first connection. If you delete this file, the computer ID will change. This can be used to restore the computer ID after reinstalling the operating system (make a backup copy of this file before reinstalling the operating system).
- Important! If you are cloning an operating system to other computers, make sure that file C:\ProgramData\aspia\host_key.json is removed from the image of the operating system being cloned. If you do not do this, then computers containing the same key file will one by one receive the same ID, pushing each other out of the server.
- The Host configuration is contained in file C:\ProgramData\aspia\host.json. If you need to transfer the configuration, use command line parameters (or similar options in the GUI) to import and export. Do not copy this file as is. This may work “now”, but may break your Host later.
- It is recommended to disable HDR mode for correct color rendering.