Aspia Client
Table of contents
- Purpose
- Installing
- Master password
- Main window
- Local address book
- Connection to a Router
- Sections of a Router
- Session types
- Credentials
- Settings
- Command line
- Environment variables
- Files
- Logs
- Android
1. Purpose
Allows you to connect to and control Hosts. It also contains the address book and the management of Routers.
2. Installing
Windows x86_64
  Run aspia-client-<version>-x86_64.msi and follow the instructions on the screen.

macOS
  Run aspia-client-<version>-universal.pkg and follow the instructions on the screen.

Ubuntu
  sudo apt install ./aspia-client-<version>-x86_64.deb

RHEL and compatible
  sudo dnf install ./aspia-client-<version>-x86_64.rpm

Android
  Open aspia-client-<version>-arm64.apk on the device and follow the instructions on the screen.
3. Master password
The addresses of the computers, their credentials and the parameters of the connections to Routers are stored in the data base of the application in the encrypted form. The key of the encryption is derived from the master password, therefore the password is mandatory: without it the application cannot read its own data, and it cannot be disabled in the settings.
Setting the password at the first start
At the very first start the application has no data base yet and offers to create the master password. The “Set Master Password” dialog contains the “New password” and “Confirm password” fields. The password must be entered twice, because it cannot be recovered later.
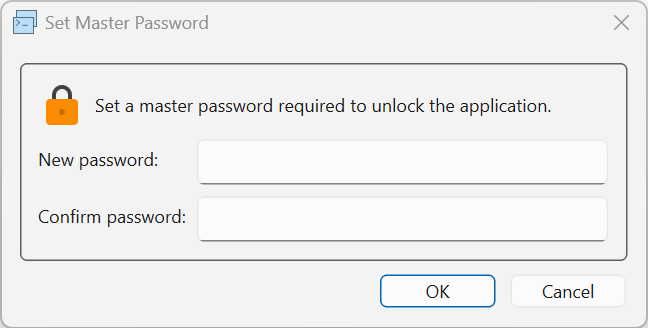
After the password is set, the data base is created and the main window of the application is opened.
Entering the password at the start
At every next start the “Unlock” dialog is displayed. Enter the master password and press OK. The button at the right side of the field shows the entered characters, so you can check what you typed.
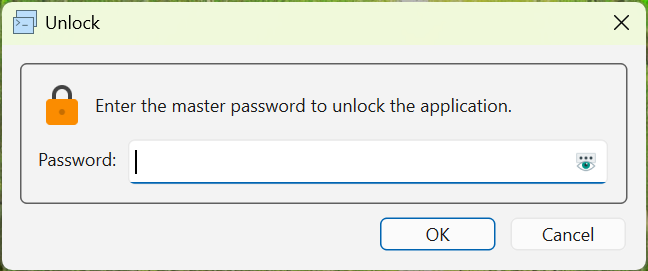
If the password is wrong, the application reports “Invalid master password” and asks for it again, the number of attempts is not limited. Pressing Cancel closes the application, because without the password it cannot read its data base.
Changing the password
Open the settings with the Settings… command of the File menu, go to the General page and press Change Master Password… in the Security group. The “Change Master Password” dialog contains the “Current password”, “New password” and “Confirm password” fields.
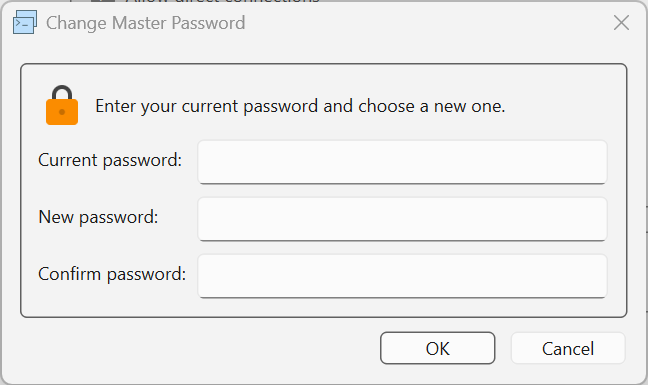
The current password is required, so the password can be changed only on a computer where the application is already unlocked. After the change the data base is re-encrypted with the new key and the next start requires the new password.
WARNING! The master password is not stored anywhere and cannot be recovered or reset. If it is lost, the data base cannot be decrypted, and the only way to continue is to create it anew. This means the loss of the address book, of the credentials and of the connections to Routers.
4. Main window
The window of the application consists of tabs. The Management tab is always present, the sessions are opened in the other tabs, unless the opening in tabs is disabled in the View menu.
The Management tab is used for:
- the local address book with its groups and computers;
- the workspaces of the Routers with the groups and the computers inside them;
- the management of the Routers, available to the administrators: the users, the connected clients and relays, the approving of the hosts.
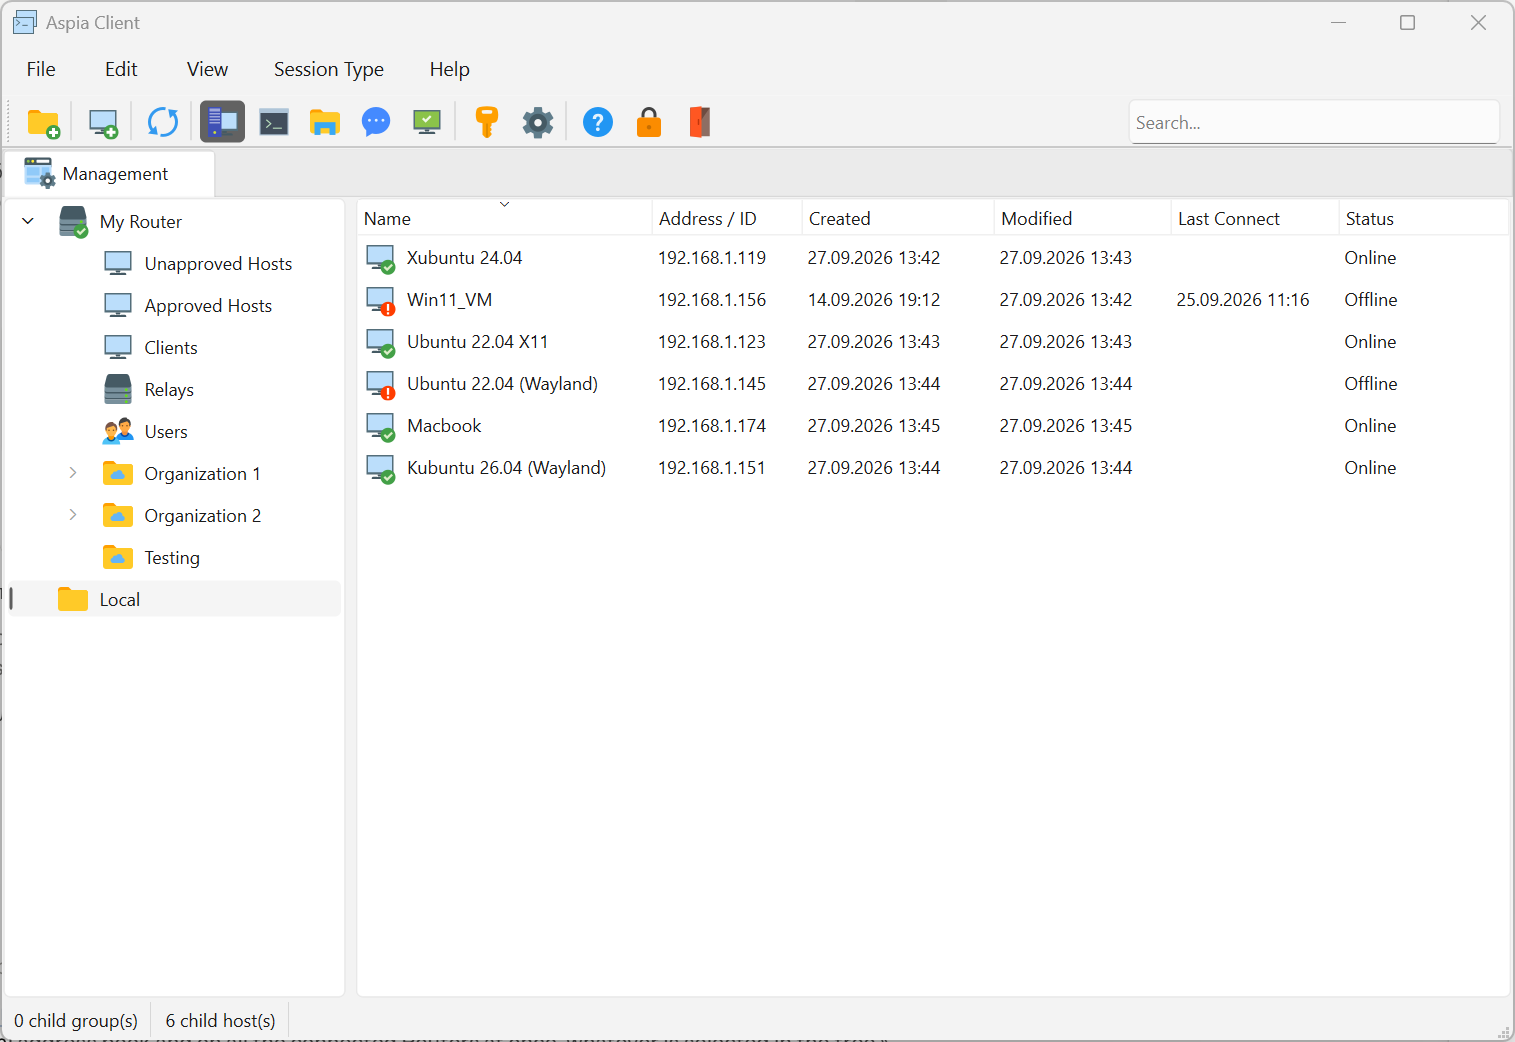
The left part of the tab contains the tree with the Local address book and with the added Routers. The sections listed above are placed under the item of the corresponding Router.
Select an item in the tree to see its contents in the right part of the tab: a list of computers, of users, of connected clients or of relays, with the set of the columns of that list. The status bar under the list shows how many items the selected item contains.
The tool bar above the list contains the commands that are applicable to the selected item: for the local address book these are the commands of the groups and of the computers, for the section of the users of a Router these are the commands of the users. The Edit, Session Type and Actions menus are filled the same way and are not displayed when the active tab has nothing to put in them.
The search field of the tool bar looks for computers in the local address book and on all the connected Routers at once, whatever is selected in the tree.
5. Local address book
The Local section is the address book stored on this computer. Unlike the sections of a Router, it does not require any connection: the entries are stored in the data base of the application and are available immediately after the start.
Use the local address book when you connect to computers by their address, when a Router is not used at all, or when you want to keep your own list of computers in addition to the list of a Router.
The address book is a tree of groups, and the computers are placed inside these groups. Select a group in the left part of the window to see its computers in the right part. The status bar shows how many groups and computers the selected group contains.
5.1. Computer groups
Groups allow you to organize the computers, for example by an office, a customer or a purpose. A group can contain other groups, so the structure can be of any depth.
To create a group, select the group it should be placed in and use Add Group. The dialog contains the following fields:
| Field | Required | Description |
|---|---|---|
| Parent Group | Yes | The group the created group is placed in. The group selected in the tree is offered by default. |
| Name | Yes | The name displayed in the list, from 1 to 64 characters. Any characters are allowed. |
| Comment | No | Any text up to 2048 characters, for example the purpose of the group. |
Commands for groups
| Command | Description |
|---|---|
 Add Group Add Group |
Creates a new group. |
 Edit Group Edit Group |
Changes the name, the comment and the parent group. |
 Delete Group Delete Group |
Deletes the group with all its contents. |
Deleting a group deletes everything inside it, including the nested groups and the computers, so the application asks for a confirmation. To move a group or a computer to another place of the tree, drag it with the mouse or change the parent group in the properties.
5.2. Computers
An entry of a computer stores everything that is needed to connect to it, so a session can be started without entering the address and the credentials every time.
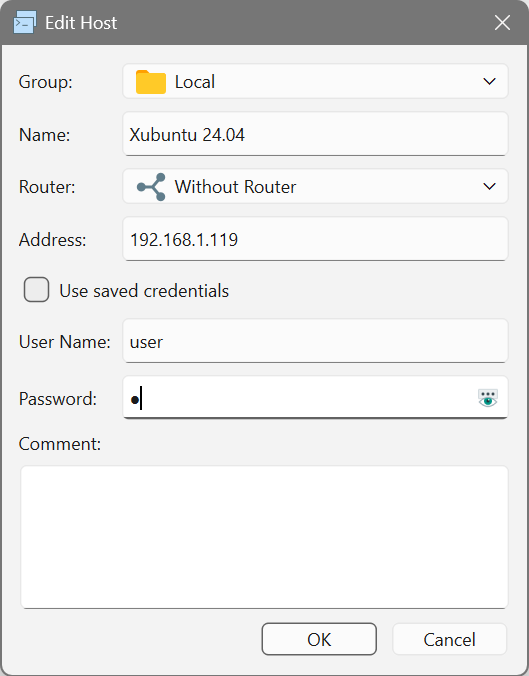
To create an entry, select a group and use Add Host. The dialog contains the following fields:
| Field | Required | Description |
|---|---|---|
| Group | Yes | The group the entry is placed in. The group selected in the tree is offered by default. |
| Name | Yes | The name displayed in the list, from 1 to 64 characters. Any characters are allowed. The name must be unique within the group. |
| Router | Yes | Either “Without Router” for a direct connection, or one of the Routers added to the address book. |
| Address / ID | Yes | The address of the Host for a direct connection. If a Router is selected, the field is called “ID” and contains the Host ID on that Router. See the formats below. |
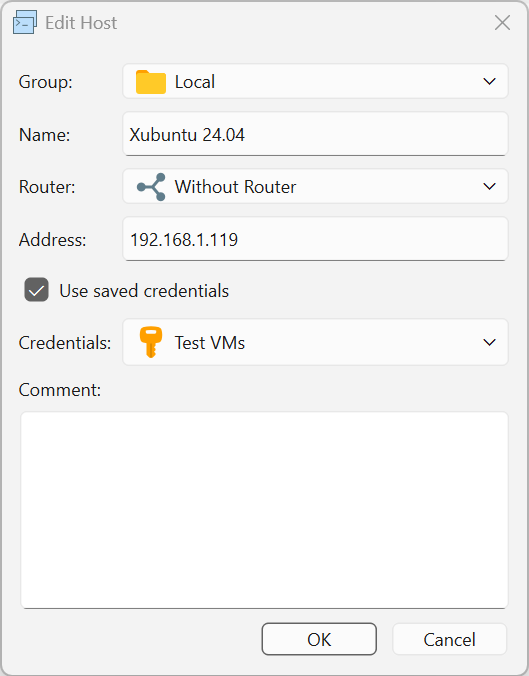
| Use saved credentials | No | Takes the user name and the password from a record of the Credentials instead of the fields below. It is available when at least one record exists. |
| Credentials | No | The record of the credentials. It is displayed instead of the user name and the password when “Use saved credentials” is enabled. |
| User Name | No | The name of the user of the Host, up to 64 characters. Letters, digits and the . _ - @ characters are allowed. It is filled in together with the password. If both fields are empty, the credentials are asked at every connection. |
| Password | No | The password of the user of the Host. It is filled in together with the user name. |
| Comment | No | Any text up to 2048 characters, for example the location of the computer or the name of its owner. |
One record of the credentials can be used by several computers: when its password changes,
it is enough to change it in one place.
If a Router is not selected, the field contains a domain name, an IPv4 or an IPv6 address. The port is specified after a colon; when it is omitted, the default port 8050 is used. An IPv6 address is always enclosed in square brackets. Examples of correct input:
IPv4 (without port)
  192.168.1.10

IPv4 (with port)
  192.168.1.10:8050

IPv6 (without port)
  [2001:0db8:11a3:09d7:1f34:8a2e:07a0:765d]

IPv6 (with port)
  [2001:0db8:11a3:09d7:1f34:8a2e:07a0:765d]:8050

Computer or domain name (without port)
  home-pc

Computer or domain name (with port)
  home-pc:8050
If a Router is selected, the field contains the Host ID issued by that Router, and the connection is established through it.
Commands for computers
| Command | Description |
|---|---|
 Add Host Add Host |
Creates a new entry. |
 Edit Host Edit Host |
Changes the parameters of the entry. |
 Copy Host Copy Host |
Creates a copy of the entry. |
 Delete Host Delete Host |
Deletes the entry. |
Copy Host is convenient when several computers differ only in the address: create one entry, fill in the credentials and then copy it the required number of times.
5.3. Backup and restore
The data base of the application is encrypted, so it cannot be copied to another computer as a file. To transfer the address book between computers or to keep a copy of it, use a backup. A backup holds the whole address book: the Routers and the saved passwords of their hosts, the local groups and computers and the credentials.
Commands (the File menu)
| Command | Description |
|---|---|
 Create Backup… Create Backup… |
Saves the address book to an .aspia-backup file. |
 Restore from Backup… Restore from Backup… |
Replaces the address book with the contents of a backup. |
| Import Old Address Book… |
Imports an address book of a previous version from an .aab file. |
The backup is encrypted with the master password. A backup made on this computer is restored
without questions; for a backup made on another computer the application asks for the master
password used there. Restoring deletes everything stored now and replaces it with the contents of
the backup, so the application asks for a confirmation.
Backups can also be created automatically at every start of the application, see the Backup group in the Settings.
If you are updating from version 2.7, use Import Old Address Book… after the first start: the
.aab files of the previous versions are not converted automatically. The file remains untouched, so
the import can be repeated.
5.4. Online check
The Status column of the list shows whether a computer is available. When
Auto-refresh Status is enabled, the state of the computers displayed in the list is checked
automatically. The state can also be refreshed at any moment with the
 Reload command.
The way the check is performed depends on the entry: a computer with an address is checked by a connection to that address, and a computer that is connected through a Router is checked by a request to that Router. A result is remembered for about a minute, so switching between the groups does not start a new check every time. Reload discards the remembered results of the displayed computers and checks them again.
6. Connection to a Router
A Router is a server that keeps the list of the Hosts registered on it and helps the Client and the Host to find each other. A connection to a Router gives the following:
- A connection without an address of the Host. A Host registered on a Router is connected to it permanently and is identified by its Host ID. The Client asks the Router for that Host, and the peers agree on the way they will reach each other: directly when it is possible, or through a Relay when the direct connection cannot be established. Neither the Host nor the Client needs a public address or a forwarded port.
- A common list of computers. The hosts and the groups are stored on the Router, so the same list is available from any computer where you connect with your account, and a change made by one user is seen by the others. The credentials of the hosts are not sent to the Router: they are stored on the computer where they were entered.
- Access control. The hosts are distributed among workspaces, and every user gets access only to the workspaces that are granted to them.
- Management of the Router, if the account has the rights of an administrator: the users, the connected clients and relays, the approving of the hosts and the remote check for updates of the hosts.
A Router is added to the address book as a separate item. The connection to it requires an account created on that Router.
Commands for Routers
| Command | Description |
|---|---|
 Add Router Add Router |
Adds a Router to the address book. |
 Edit Router Edit Router |
Changes the parameters of the connection. |
 Delete Router Delete Router |
Removes the Router from the address book. |
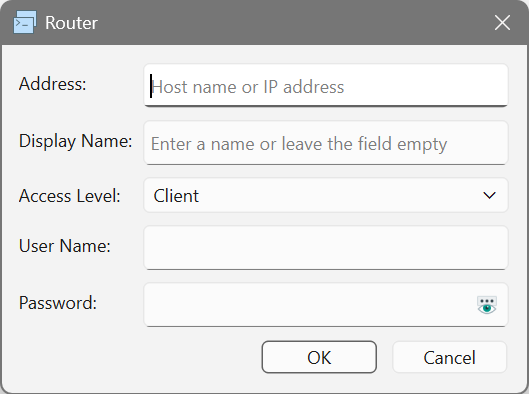
The dialog of a Router contains the following fields:
| Field | Required | Description |
|---|---|---|
| Address | Yes | The address of the Router. The port is specified after a colon; when it is omitted, the default port 8062 is used. |
| Display Name | No | The name under which the Router is displayed in the tree. When the field is empty, the address of the Router is displayed instead. Give a name to the Routers when there are several of them or when the address says nothing about the purpose of the server. |
| Access Level | Yes | The type of the session the connection is established with: Administrator, Manager or Operator. The account must have the rights of the selected type on the Router. |
| User Name | Yes | The name of the account on the Router. |
| Password | Yes | The password of the account on the Router. |
The icon of a Router in the tree shows the state of the connection to it: offline, connecting or online.
Two-factor authentication
Two-factor authentication is mandatory for all users of a Router and cannot be disabled.
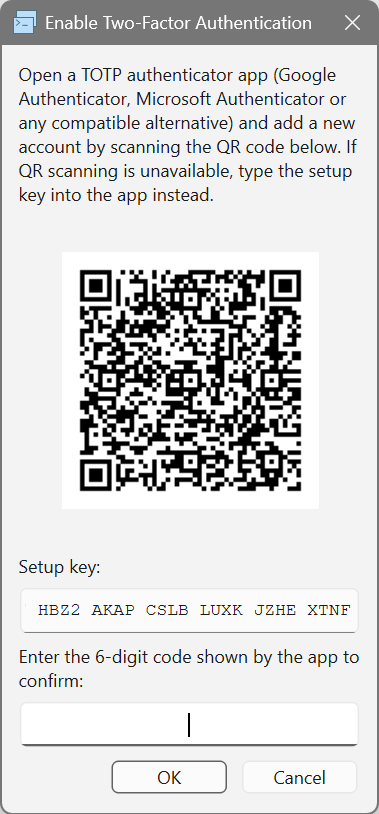
At the first connection the “Enable Two-Factor Authentication” dialog is displayed. It contains a QR code that must be scanned with an authenticator application, and the same key in the text form for the case when the code cannot be scanned. The enrollment is completed by entering the six-digit code shown by the application.
At the next connections the “Two-Factor Authentication” dialog asks for the six-digit code. After a successful authentication the computer receives a token and the code is not requested at the connections from it any more. If an administrator resets the authentication of the user, the enrollment is performed again.
Rights of a user
The set of the sections available after the connection depends on the type of the sessions of the user:
| Type | Available sections |
|---|---|
| Administrator | All the sections, including the users, the clients and the relays of the Router. |
| Manager | The workspaces available to the user, their hosts and the unapproved hosts. |
| Operator | The workspaces available to the user, their hosts and the unapproved hosts. |
The rights are inherited: an administrator has the rights of a manager and an operator, a manager has the rights of an operator.
7. Sections of a Router
The sections listed below are displayed under the item of the Router.
7.1. Unapproved hosts
A Host that connects to the Router for the first time is not stored in the data base of the Router and receives a temporary Host ID. Such hosts are displayed in the Unapproved Hosts section.
The section is available to the users of all the types, and the users of all the types can connect to the hosts of this section: unlike the approved hosts, these hosts do not belong to any workspace yet, so the access to them is not limited by the workspaces granted to a user. The list displays the Host ID, the name of the computer, the operating system and the version; the address of a host is displayed to the administrators only.
You can connect to an unapproved host as usual: all the types of the sessions are available for it. The difference is that the host has no entry in the data base yet, so its parameters cannot be stored: the display name, the group, the comment and the credentials cannot be specified, and the user name and the password are asked at every connection. The temporary Host ID is not permanent either and changes when the host reconnects to the Router.
Approve the host to make these parameters available. After that it is stored in the data base, receives a permanent Host ID and can be edited like any other host.
Commands
| Command | Description |
|---|---|
 Approve Approve |
Approves the host: it is stored in the data base, receives a permanent Host ID and moves to the “Approved Hosts” section. |
7.2. Approved hosts
The Approved Hosts section contains all the hosts stored in the data base of the Router and is available to an administrator. For every host the list displays its Host ID, the display name, the name of the computer, the address, the comment, the workspace, the operating system, the version, the architecture, the time of the last connection and of the last modification and the status.
Commands
| Command | Description |
|---|---|
| Edit Host |
Changes the workspace and the group of the host, the display name, the comment and the credentials. See Host properties. |
 Check for Updates Check for Updates |
Makes the host check for updates immediately. The host must be online. |
 Disconnect Disconnect |
Disconnects the host from the Router. The host must be online. |
 Disconnect All Disconnect All |
Disconnects all the hosts from the Router. |
 Telemetry Telemetry |
Displays the statistics reported by the host: the start of the service, the logins, the connections to the Router, the updates, the users and the security settings. |
| Remove |
Uninstalls the Host on the remote computer and deletes its entry from the data base. |
 Save… Save… |
Saves the list displayed in the section to a JSON file. |
The context menu of an online host also contains the types of the sessions to connect to it. The
Copy Link submenu copies a link to the connection with the selected type of the session, and
Copy Row and Copy Value copy the data of the host.
WARNING! Remove is not just a deletion of a record. The Router sends the command to the Host, and the Host disables the use of the Router, erases the address and the public key of the Router, its Host ID and its key, and then uninstalls the application from the computer. The remote computer becomes unavailable for connections, and the Host has to be installed and configured again to return it.
If the host is offline at the moment of the command, the removal is scheduled and is performed when the host connects to the Router the next time.
7.3. Clients
The Clients section displays the clients connected to the Router at the moment and is available to an administrator. For every client the list displays the name of the computer, the IP address, the time of the connection, the version, the architecture and the operating system.
Commands
| Command | Description |
|---|---|
| Disconnect |
Disconnects the selected session. |
| Disconnect All |
Disconnects all the sessions. |
| Save… |
Saves the list displayed in the section to a JSON file. |
 Copy Row Copy Row |
Copies the whole line of the list to the clipboard. |
| Copy Value |
Copies the value of the cell the menu was called on to the clipboard. |
7.4. Relays
The Relays section displays the Relays connected to the Router at the moment and is available to an administrator. For every Relay the list displays its address, the time of the connection, the size of the pool of the keys, the version, the name of the computer, the architecture and the operating system, and for every connection passing through it the user name, the Host ID and the address of the host, the address of the client and the amount of the transferred data.
Commands
| Command | Description |
|---|---|
| Disconnect |
Disconnects the selected Relay. |
| Disconnect All |
Disconnects all the Relays. |
| Save… |
Saves the list displayed in the section to a JSON file. |
| Copy Row |
Copies the whole line of the list to the clipboard. |
| Copy Value |
Copies the value of the cell the menu was called on to the clipboard. |
7.5. Users
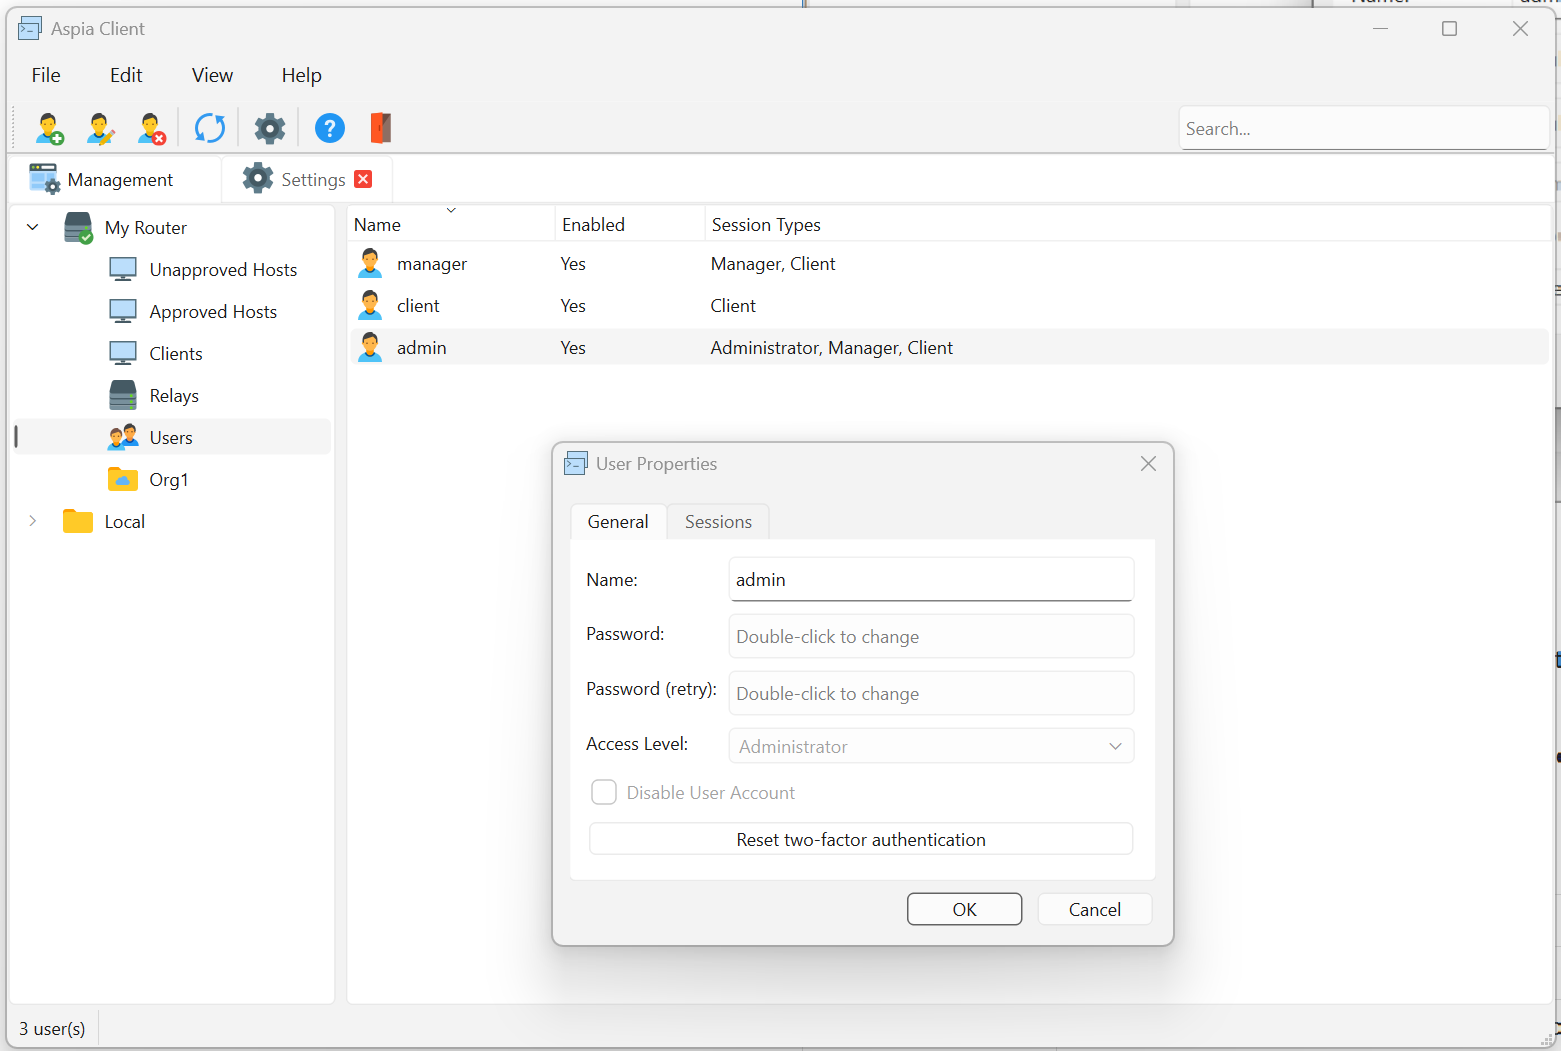
The Users section contains the users of the Router and is available to an administrator. The list displays the name of a user, whether the account is enabled and the types of its sessions.
Commands
| Command | Description |
|---|---|
 Add User Add User |
Creates a new user of the Router. |
 Edit User Edit User |
Changes the parameters of the user. |
 Delete User Delete User |
Deletes the user. |
The properties of a user contain the name and the password, the access level, the switch that disables the account and the button that resets the two-factor authentication. The button is displayed only if the enrollment has already been performed. A separate tab lists the current sessions of the user with the time of the sign in, the last activity and the address.
7.6. Workspaces
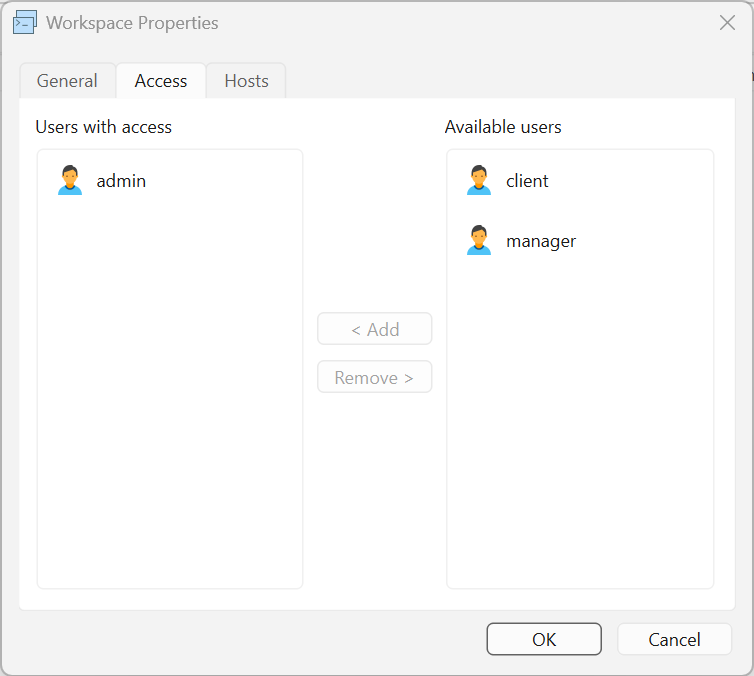
A workspace has a name and a comment. Hosts are added to a workspace and users are given access to it: a user sees the hosts of the workspaces to which they have access. Groups of computers can be created inside a workspace; a host can be placed into a group or can stay at the root of the workspace.
A host is not required to belong to a workspace. Right after the approval a host belongs to no workspace and is displayed only in the Approved Hosts section, which is available to an administrator. A host belongs to one workspace at a time. An administrator adds hosts to a workspace and removes them from it in three ways:
- in the properties of the workspace, by the Edit Workspace command. Only a host without a workspace can be added there;
- in the properties of the host, by the Edit Host command. There a host can also be moved from one workspace to another, see Host properties;
- by dragging a host with the mouse onto a workspace or onto one of its groups.
The credentials of the hosts are not sent to the Router: they are stored on the computer where they were entered and are available only there. When a host is removed from a workspace and when a workspace is deleted, the hosts themselves are not deleted.
Rights of the users
An administrator sees and manages all the workspaces of the Router, whether or not they are in the list of the users of a workspace. The managers and the operators see only the workspaces to which they are given access in the properties of a workspace. This also applies to an administrator who connects with the Manager or Operator access level.
| Operation | Administrator | Manager | Operator |
|---|---|---|---|
| Viewing the workspaces, the groups and the hosts | + | + | + |
| Connecting to the hosts | + | + | + |
| Creating, editing and deleting the workspaces | + | - | - |
| Adding hosts to a workspace and removing them from it | + | - | - |
| Granting and revoking the access of the users | + | - | - |
| Creating, editing and deleting the groups | + | + | - |
| Editing the hosts and moving them between the groups | + | + | - |
Commands
| Command | Description |
|---|---|
 Add Workspace Add Workspace |
Creates a new workspace. |
 Edit Workspace Edit Workspace |
Changes the name and the comment, the list of the users who have access and the list of the hosts. |
 Delete Workspace Delete Workspace |
Deletes the workspace. |
The commands above are available to an administrator only. The properties of a workspace contain its name and comment, the list of the users who have access to it and the list of its hosts.
Groups of computers inside a workspace are created, edited and deleted with the same commands as the groups of the local address book. A host is moved to another group by dragging it in the list of the computers or with the Edit Host command. With the same command an administrator also moves a host to another workspace.
The Edit Host command opens the properties of a host of the Router. It is available in a workspace, in the Approved Hosts section and in the search results. The dialog contains the following fields:
| Field | Description |
|---|---|
| Workspace | The workspace the host belongs to. “Not assigned” means that the host belongs to no workspace. Only an administrator can change the workspace; for the other users the field shows the current one. |
| Group | The group inside the selected workspace. “Not assigned” places the host at the root of the workspace. The field is not available when the host belongs to no workspace. |
| Display Name | The name displayed in the lists, up to 64 bytes (64 Latin characters, fewer characters of other alphabets). If the field is empty, the name of the computer is displayed. |
| Use saved credentials | Takes the user name and the password from a record of the Credentials instead of the fields below. It is available when at least one record exists. |
| Credentials | The record of the credentials. It is displayed instead of the user name and the password when “Use saved credentials” is enabled. |
| User Name | The name of the user of the Host. It is filled in together with the password. If both fields are empty, the credentials are asked at every connection. |
| Password | The password of the user of the Host. It is filled in together with the user name. |
| Comment | Any text up to 8 KB. |
The workspace, the group, the display name and the comment are stored on the Router and are the same
for all its users. The credentials are stored on this computer only and are not sent to the Router.
An operator can change only the credentials, the other fields are read-only for them.
8. Session types
A session is started from any list of computers: from the local address book, from a workspace of a Router or from the section of the approved hosts.
Double click a computer to start a session of the type that is selected in the Session Type menu. This type is remembered and is used for all the following connections until it is changed. If another type is needed only once, use the corresponding command of the tool bar instead of the double click:
Commands of the connection
| Command | Description |
|---|---|
 Desktop Desktop |
Control of the desktop of the remote computer. |
 Terminal Terminal |
Command line of the remote computer. |
 File Transfer File Transfer |
Transfer of files between the computers. |
 System Information System Information |
Information about the hardware and the software. |
 Chat Chat |
Text messages with the user of the remote computer. |
If the user name and the password are not filled in the entry of the computer, they are asked at the start of the session. Several sessions with different computers, as well as several sessions of different types with the same computer, can be opened at the same time.
8.1. Desktop
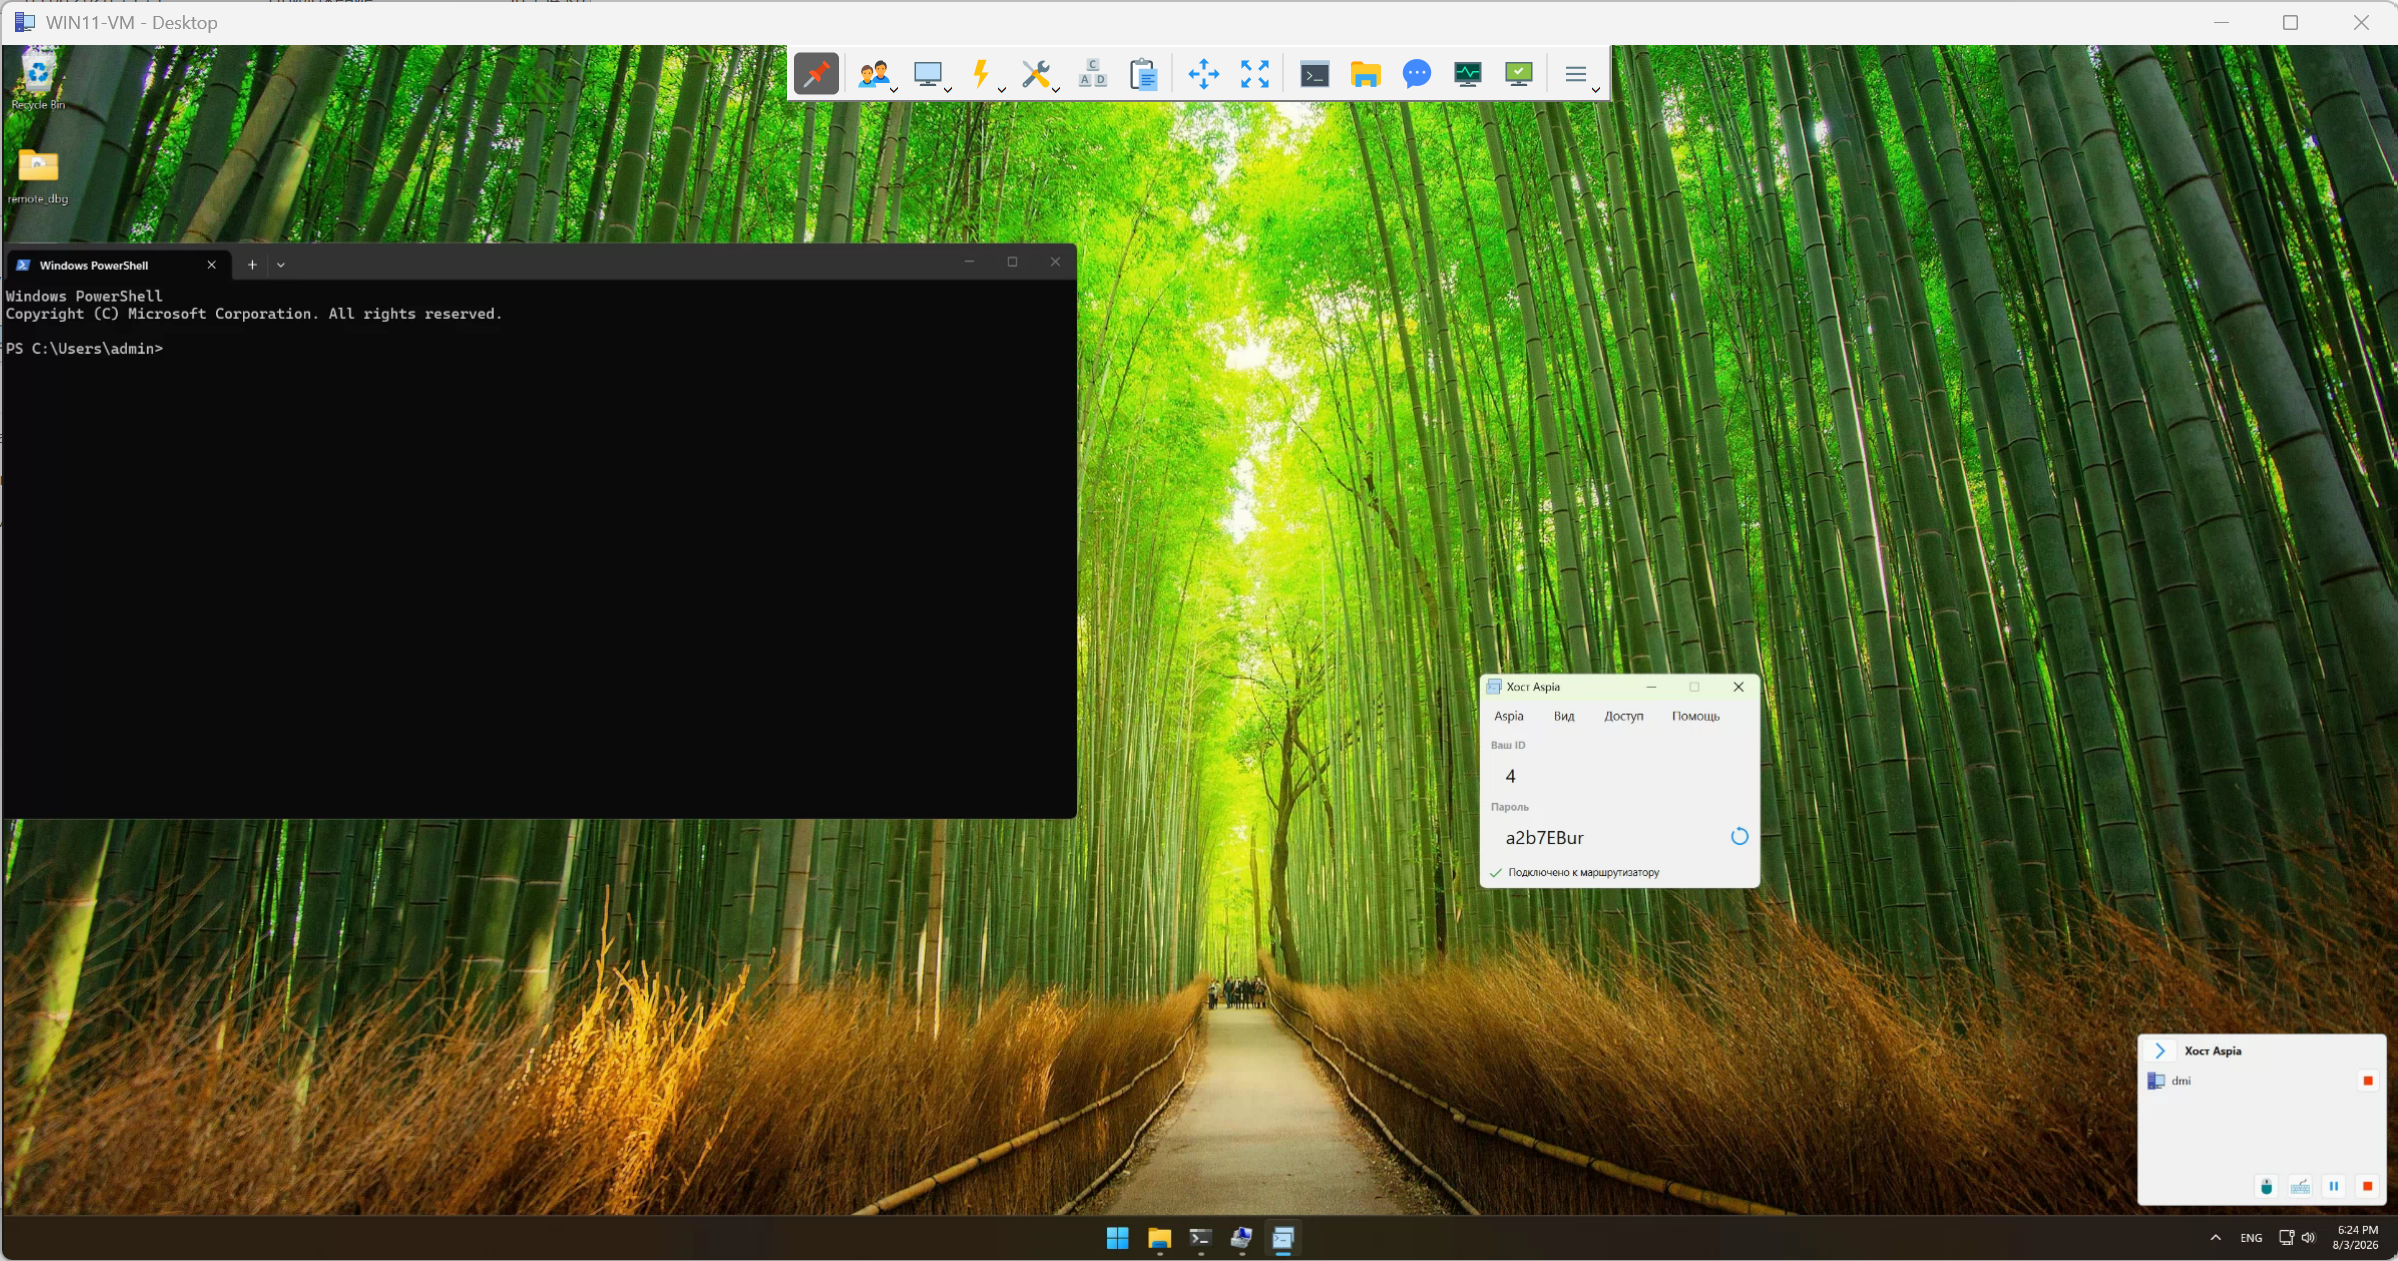
Allows to connect to a remote computer to interact with its desktop.
At the top of the desktop window there is a toolbar that allows you to perform a number of actions. It appears when you hover the mouse cursor and hides when the cursor leaves the toolbar area.
Toolbar buttons
| Name | Description |
|---|---|
 Lock toolbar Lock toolbar |
If the button is checked, the toolbar is always displayed. |
 Auto size Auto size |
Changes the window size to the optimal one based on the size of the remote desktop. |
 Full screen Full screen |
Switches the window to full screen or returns the original state. |
 Ctrl+Alt+Delete Ctrl+Alt+Delete |
Sends the Ctrl+Alt+Delete key combination to the remote computer. |
 Power control Power control |
Opens the menu of the power management of the remote computer. |
 Switch Session Switch Session |
Switches to another user session of the remote computer. Available for Windows. |
| Terminal |
Starts a terminal session with the same computer. |
| File transfer |
Starts a file transfer session with the same computer. |
| System Information |
Starts a system information session with the same computer. |
| Chat |
Starts a text chat with the user of the remote computer. |
 Task Manager Task Manager |
Opens the task manager of the remote computer. |
 Tools Tools |
Runs a tool or a script on the remote computer. |
 Paste clipboard as keystrokes Paste clipboard as keystrokes |
Pastes the contents of the clipboard as keyboard key presses. |
 Start recording Start recording |
Starts or stops the recording of the session to a video file. |
 Minimize Minimize |
Minimizes the window of the session. |
 Close Close |
Closes the session. |
 Advanced menu Advanced menu |
Displays the menu with the rest of the actions. |
If the remote computer has more than one monitor, the buttons for the selection of a monitor and of its resolution are displayed in the toolbar as well.

Power control menu
| Command | Description |
|---|---|
 Shutdown Shutdown |
Shuts down the remote computer. |
 Reboot Reboot |
Restarts the remote computer. |
| Reboot (Safe mode) |
Restarts the remote computer in the safe mode. |
 Logoff Logoff |
Ends the session of the user of the remote computer. |
 Lock Lock |
Locks the session of the user of the remote computer. |
Advanced menu
| Name | Description |
|---|---|
| Scale | Allows to change the scaling mode (fit to the window or a scale in percent). |
| Fit window | Changes the size of the window so that the whole remote desktop fits in it. |
| Automatic scrolling | The contents of the window scroll automatically as the cursor approaches the window border. |
| Save screenshot… | Saves the current image of the remote desktop to a file. |
| Statistics | Opens the dialog with the metrics of the connection. |
8.2. Terminal
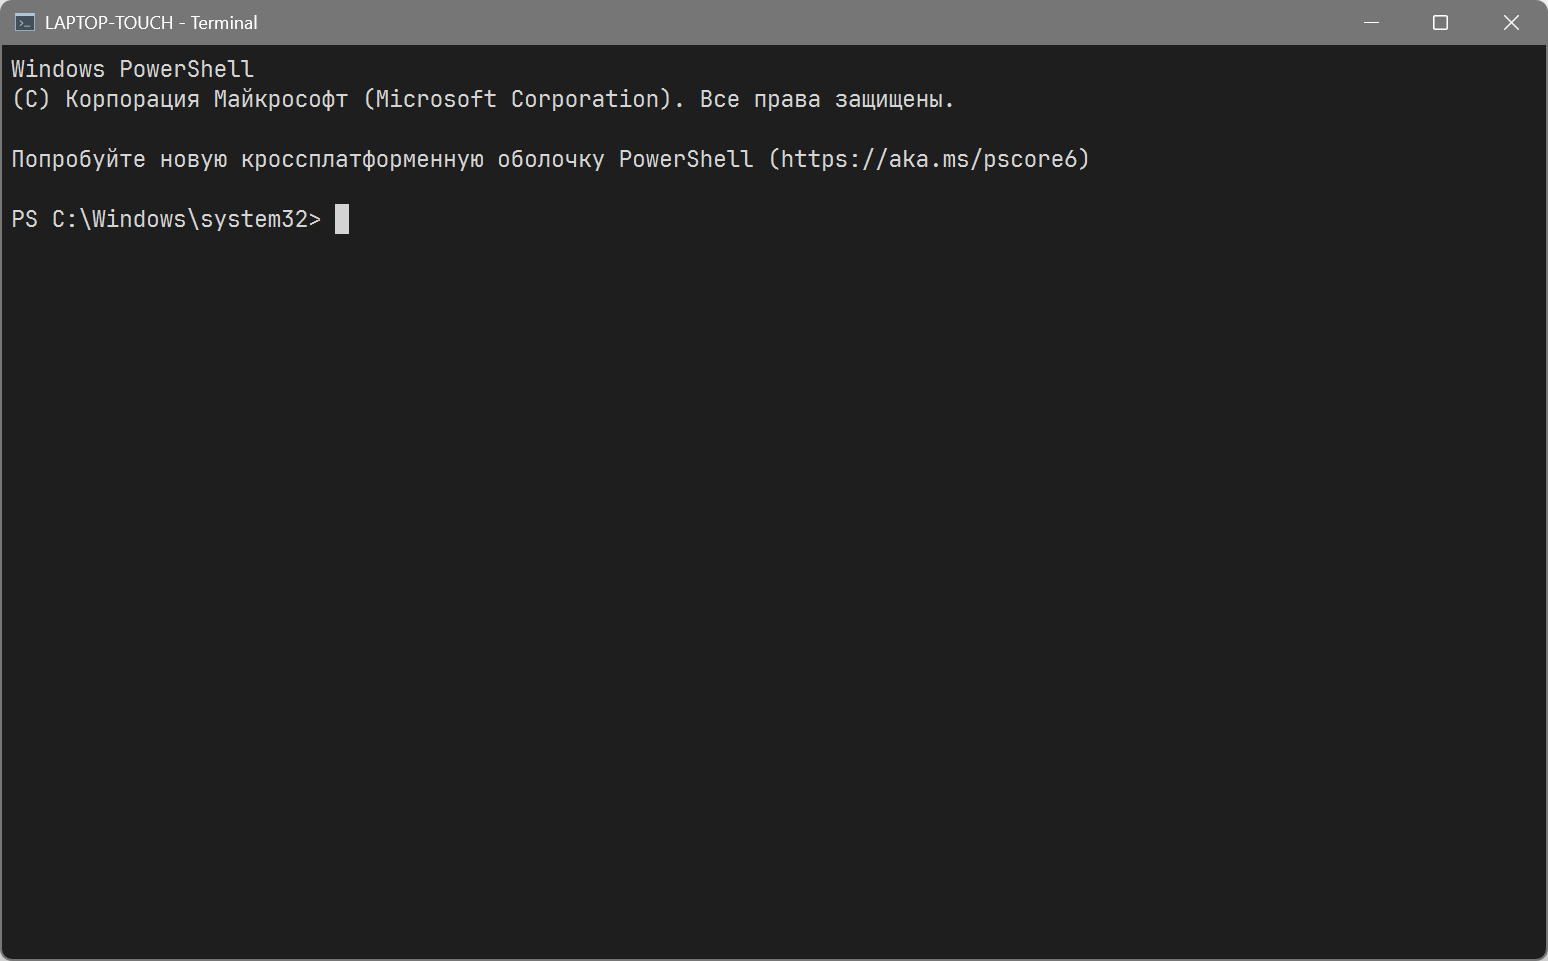
Gives access to the command line of the remote computer. The command interpreter of the operating system is used: on Windows it is PowerShell, on Linux and macOS it is the shell of the user.
At the start of the session the name and the password of an account of the operating system of the remote computer are requested. The terminal is started on behalf of this account, so its rights determine what can be done in the session.
8.3. File transfer
Allows to transfer files between the local and the remote computer, delete and rename files, create directories.
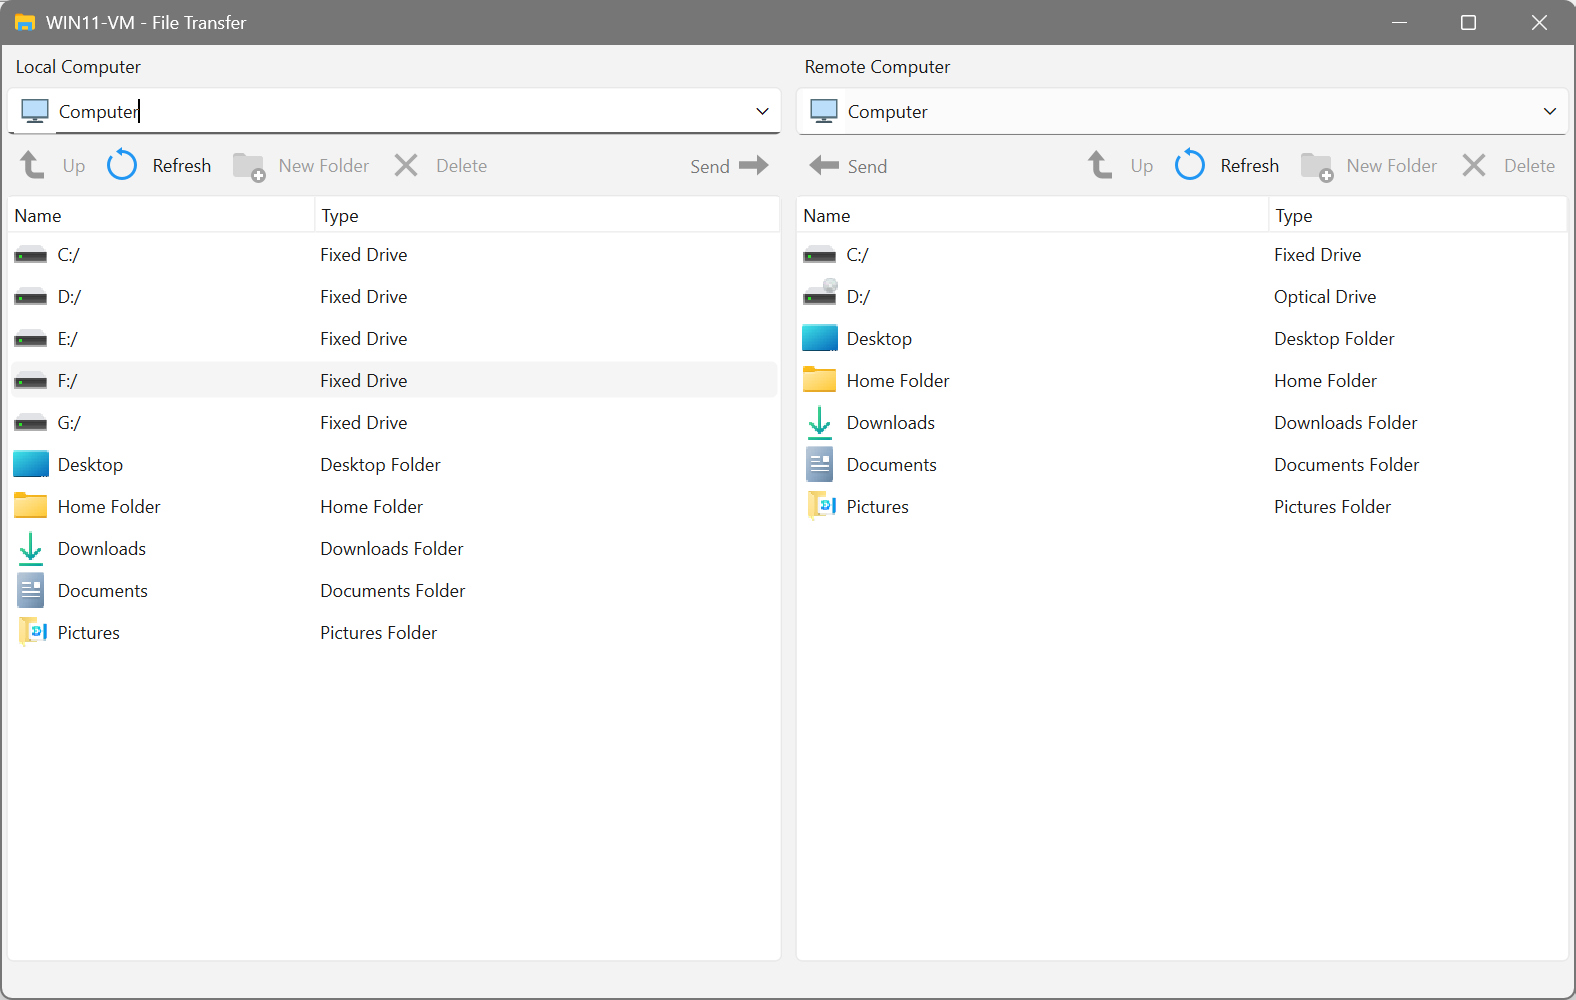
Hot keys
| Key combination | Description |
|---|---|
| Backspace | Go to parent directory |
| F2 | Rename selected item |
| F4 | View list of disks |
| F5 | Refresh |
| F11 | Send selected item or items |
| Delete | Delete selected item or items |
8.4. System information
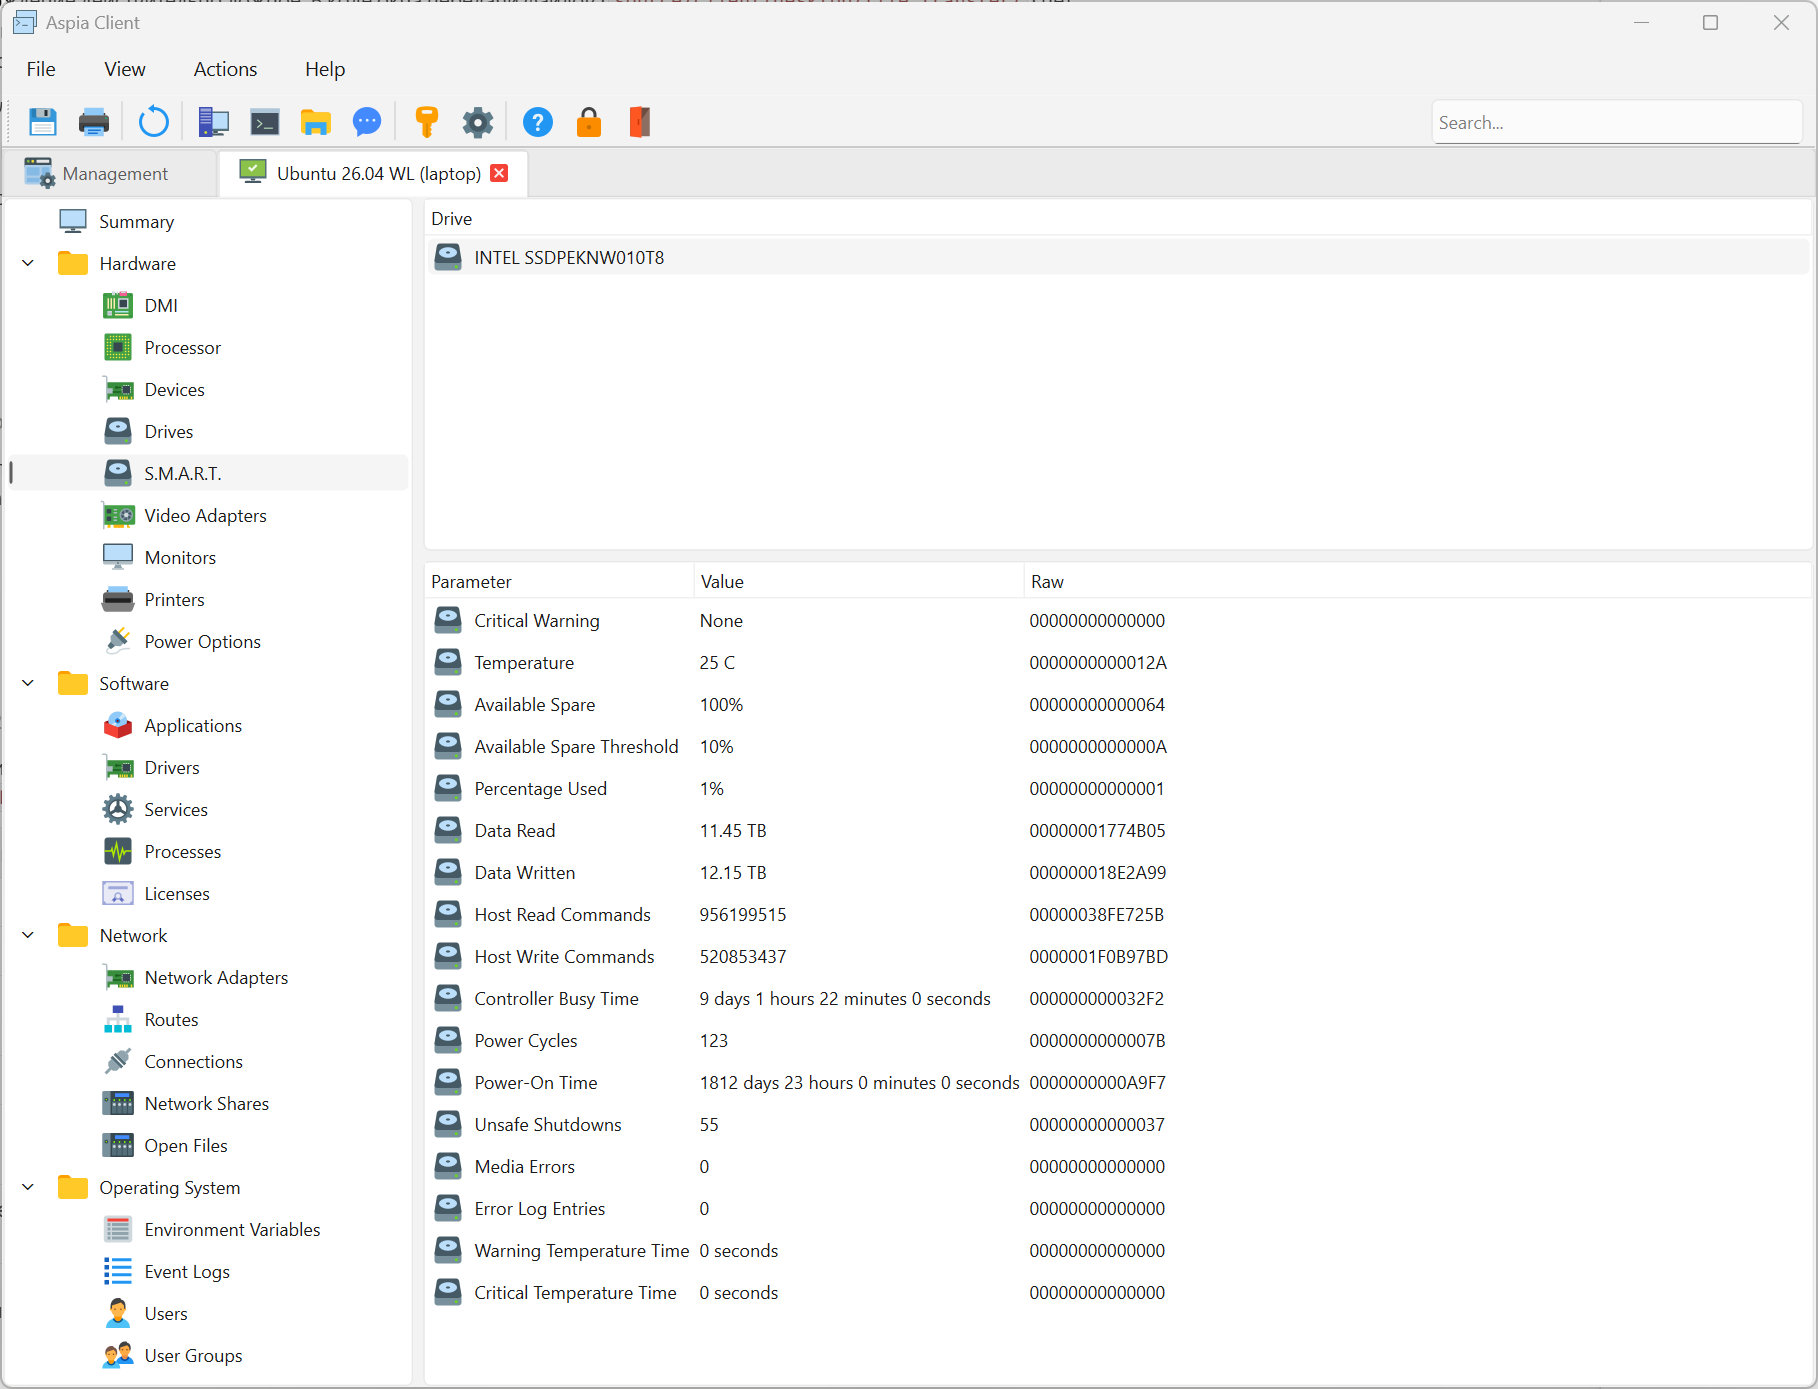
Allows to view the information about the remote computer: the processor, the memory, the disks and their S.M.A.R.T., the devices, the installed applications, the network parameters, the users and so on. The resulting information can be saved to a file or printed out.
A double click on a line copies it to the clipboard. In the context menu you can copy the name of a parameter, its value or the whole line.
8.5. Chat
Allows to exchange text messages with the user of the remote computer. The history of the correspondence is saved and is displayed again at the next connection to the same computer.
9. Credentials
A record of credentials stores a user name and a password under a name. In the properties of a computer the record is selected with “Use saved credentials” instead of entering the user name and the password, so one record can be used by several computers of the local address book and of the Routers: when the password changes, it is enough to change it in one place. The records are stored in the data base of the application and are not sent to the Routers.
The list of the records is opened with the Credentials… command of the File menu.
Commands
| Command | Description |
|---|---|
 Add Credentials Add Credentials |
Creates a new record. |
 Edit Credentials Edit Credentials |
Changes the record. |
 Delete Credentials Delete Credentials |
Deletes the record. The computers that used it lose their credentials, and they are asked at the next connection. |
| Export Credentials… |
Saves the selected records to an .aspia-credentials file. |
| Import Credentials… |
Loads the records from an .aspia-credentials file. |
The dialog of a record contains the following fields:
| Field | Required | Description |
|---|---|---|
| Name | Yes | The name displayed in the list and in the properties of the computers, up to 64 characters. |
| User Name | Yes | The name of the user of the Host, up to 64 characters. Letters, digits and the . _ - @ characters are allowed. |
| Password | Yes | The password of the user of the Host. |
At the export the records to save are checked and a password is entered; the file is encrypted with
it, and the same password is asked at the import. At the import the records of the file are
displayed with their status: a “New” record is added, an “Exists” record was imported or created
from the same record before and is replaced. Unlike a backup, the export and the import concern the
credentials only and do not change the rest of the data base.
10. Settings
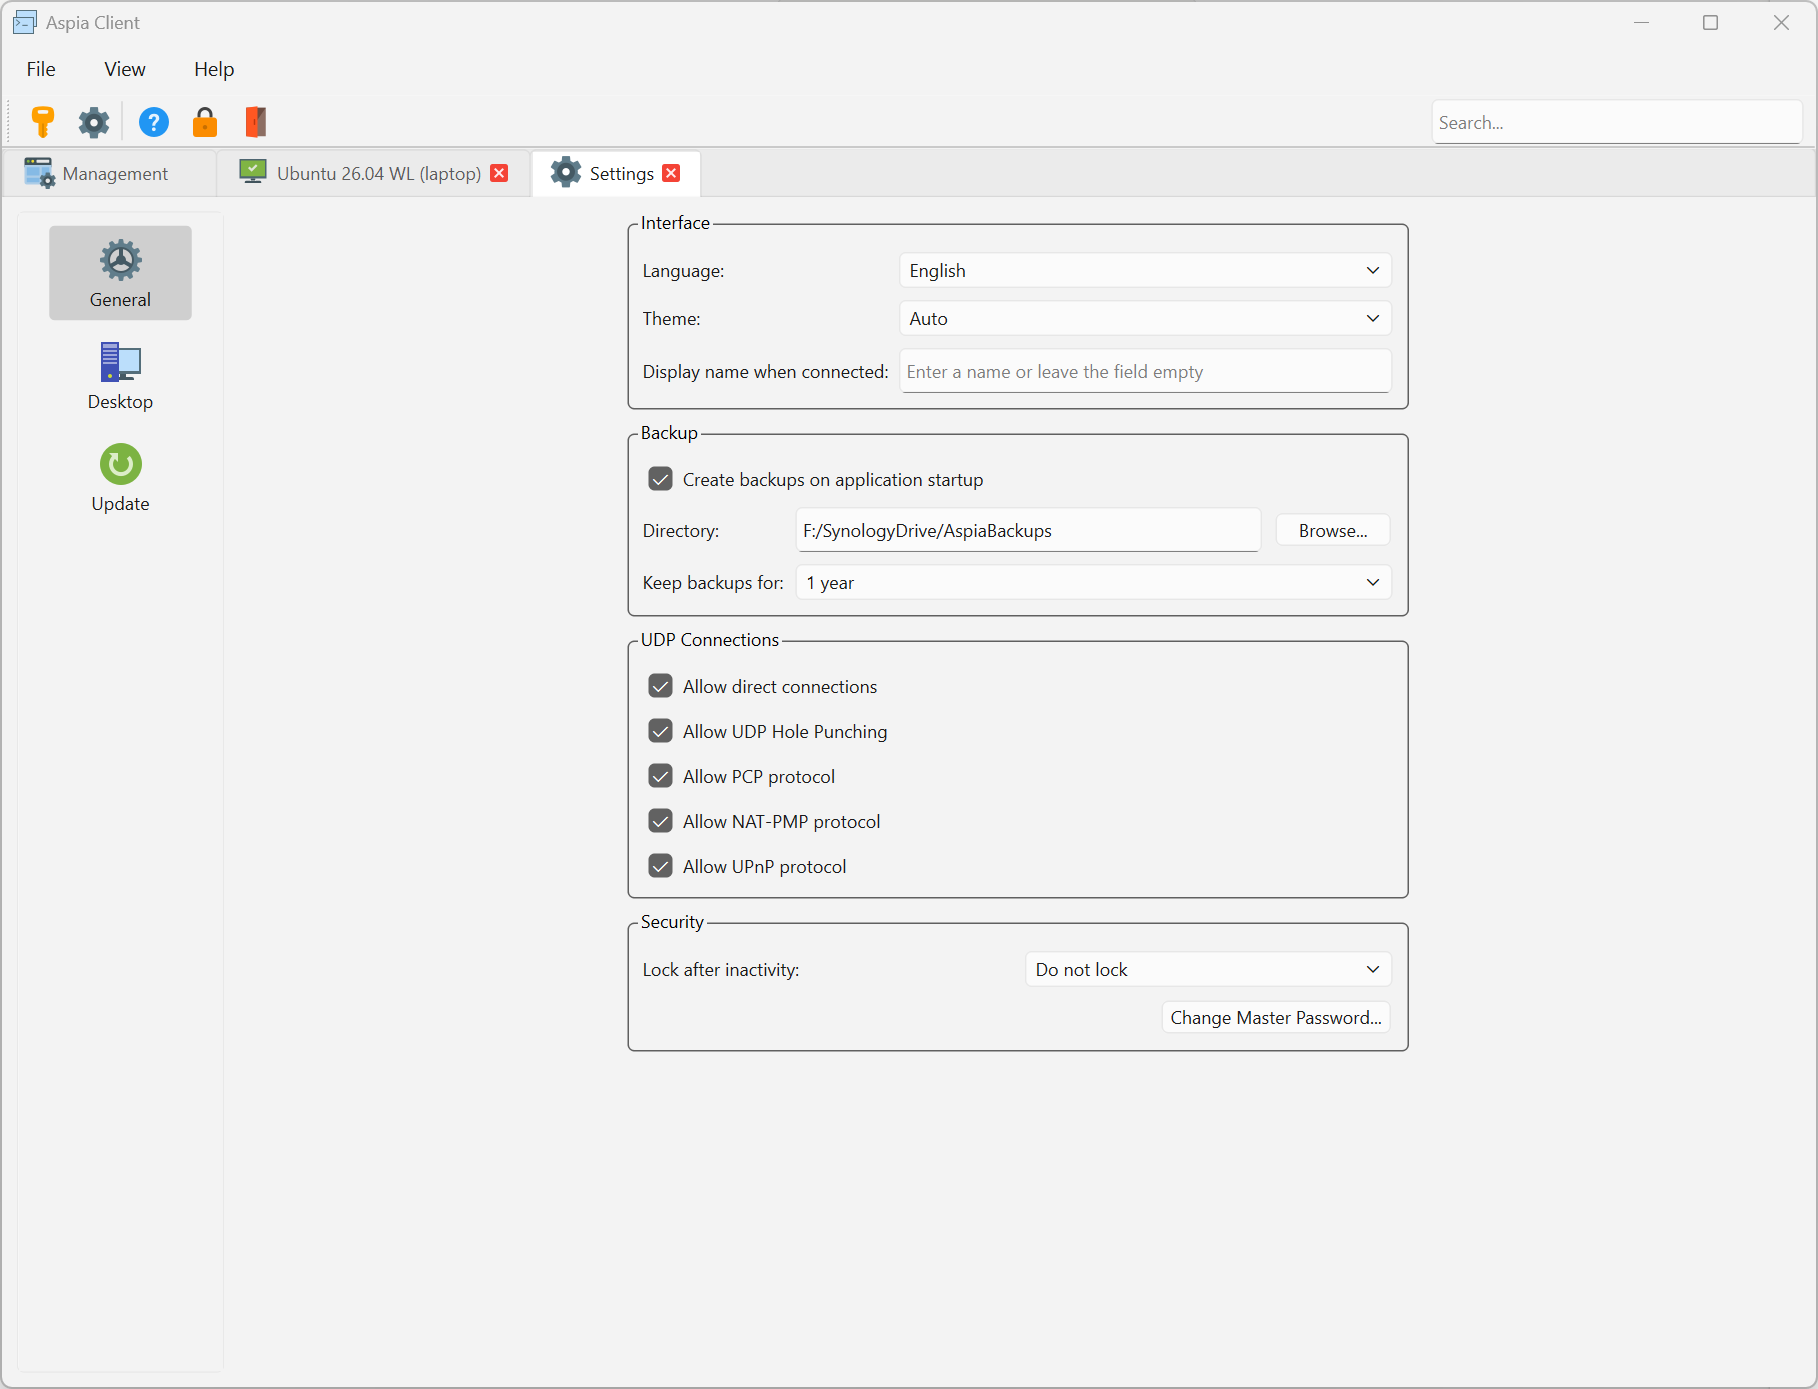
The settings are opened with the Settings… command of the File menu. They are displayed in a tab of the main window and are divided into the General, Desktop and Update pages.
| Page | Group | Parameters |
|---|---|---|
| General | Interface | The language of the interface, the theme and the name displayed to the user of the remote computer. |
| General | Backup | The creation of a backup of the data base at the start of the application, the directory for the backups and how long they are kept. |
| General | UDP Connections | Enables direct connections and the methods of the passage of NAT: UDP hole punching, PCP, NAT-PMP and UPnP. |
| General | Security | The locking of the application after inactivity and the change of the master password. |
| Desktop | Features | The parameters of a desktop session: the audio, the clipboard, the display of the remote cursor, the disabling of the effects and of the wallpaper, the locking of the computer at disconnect, the blocking of the remote input, the sending of key combinations and the hardware video encoding and decoding. |
| Desktop | Screen | The preferred resolution of the remote desktop. |
| Desktop | Recording | The automatic start of the recording of a session and the directory for the files. |
| Update | Update | The check for updates at the start, the update channel and the manual check for updates. |
11. Command line
The Client accepts a link of the form aspia:// as the only argument. Such a link is copied in the
address book and allows to start a session at once. If the application is already running, the link
is opened in it.
| Argument | Description |
|---|---|
--version |
Displays the version of the application. |
--help |
Displays help about command line arguments. |
12. Environment variables
- ASPIA_NO_VERIFY_TLS_PEER - If the variable is declared, then the validity of the TLS certificate is not checked when checking for updates and downloading them. It is not recommended to declare this variable unnecessarily.
- ASPIA_SMALL_ICON_SIZE - Sets the size of the small icons of the interface in pixels, from 16 to 48, default 24.
13. Files
The Client keeps its data in the profile of the user, so every user of the computer has their own address book and settings.
Data base client.db3 contains all the important data of the application.
Windows
  %APPDATA%\aspia\client.db3

Linux
  ~/.local/share/aspia/client.db3
  ($XDG_DATA_HOME/aspia if the variable is set)

macOS
  ~/Library/Application Support/aspia/client.db3

Android
  /data/data/org.aspia.client/files/aspia/client.db3
Parameters file client.ini contains the parameters of the appearance of the application.
Windows
  %APPDATA%\aspia\client.ini

Linux
  ~/.config/aspia/client.ini
  ($XDG_CONFIG_HOME/aspia if the variable is set)

macOS
  ~/.config/aspia/client.ini

Android
  /data/data/org.aspia.client/files/settings/aspia/client.ini
Chat history is kept in the chat directory next to the data base, in a separate file for
every computer.
14. Logs
By default the Client writes the log to files. To configure the logging parameters, use the following recommendations:
- To set the log level, declare an environment variable ASPIA_LOG_LEVEL with a value from 0 to 4 (0 - trace, 1 - info, 2 - warning, 3 - error, 4 - fatal). Decreasing the value increases the number of messages in the log.
- To enable logging to a file (if it is not enabled by default for platform), declare environment variable ASPIA_LOG_TO_FILE with a value other than 0. If the environment variable is declared with a value of 0, then logging to file will be disabled.
- To enable logging to stdout (if it is not enabled by default for platform), declare environment variable ASPIA_LOG_TO_STDOUT with a value other than 0. If the environment variable is declared with a value of 0, then logging to stdout will be disabled.
- By default, log files older than 14 days are automatically deleted. If you want to change this value, then declare environment variable ASPIA_MAX_LOG_FILE_AGE with a numeric value in days. The variable can take a value from 0 to 366. If the variable is set to 0, then the log files will not be automatically deleted.
The log files are located in the following paths:
Windows
  %TEMP%\aspia\aspia_client-*.log

Linux
  ~/.local/state/aspia/logs/aspia_client-*.log
  ($XDG_STATE_HOME/aspia/logs if the variable is set)

macOS
  $TMPDIR/aspia/aspia_client-*.log

Android
  /sdcard/Android/data/org.aspia.client/files/log/
15. Android
The Client for Android has the same local address book, connections to Routers and credentials as the desktop version. The data base is protected with the master password; on devices that support it the application can also be unlocked with the fingerprint. The Desktop, File Transfer and Chat sessions are available. A Router is always connected with the Operator access level, so the management of the Router is not available.
The backups are compatible with the desktop version: a backup created on a computer can be restored on a device, and the other way round. The Create Backup and Restore from Backup commands are in the menu of the Local section. The credentials are exported and imported the same way, with the Export Credentials and Import Credentials commands on the credentials page of the Settings section.
In a desktop session the screen works like a touchpad: the finger moves the cursor, and a click is made at the position of the cursor. The menu of the session is opened with the button in the lower right corner: the choice of the monitor, the power control, the on-screen keyboard, Ctrl+Alt+Del, the user sessions and the disconnection. Above the on-screen keyboard there is a bar with additional keys; a modifier key stays pressed until the next key.
| Gesture | Action |
|---|---|
| Moving one finger | Moves the cursor. |
| Tap | Left click. |
| Double tap | Double click. |
| Tap, touch again and move, or hold the finger and move | Drag with the left button held. Near the edge of the screen the view scrolls. |
| Tap with two fingers | Right click. |
| Pinching or spreading two fingers | Zooms the image in or out (up to 5 times); moving the fingers moves the zoomed image. |
| Moving two fingers up or down | Scrolls with the mouse wheel. |